Sunday: At Home

Toronto has already far exceeded its average winter snowfall total | News

It snowed today in Toronto – between 5-10 centimeters to be exact. The first snowfall was absolutely stunning, and definitely got everyone on my block in a good mood! The Christmas lights are up around my neighbourhood, and I even read that the city is handing out a prize to the best dressed home for the holidays…pretty neat! If you have been wondering how people are getting their Christmas shopping done, I would have to say “very cautiously.” Although the stores are pushing their late holiday hours, many of us feel that it is not safe to shop among big crowds at the mall at this time.

You really have to take into consideration the rising cases within your area before you venture into long line ups, cashier check outs, and public washrooms. However, don’t let me be the bearer of bad news because there is always the option of online shopping from the comfort of your own home. You can buy anything online; from books to big screen televisions, the choice is yours! Take a break for a moment from making the homemade gifts we discussed last week, and allow me to give you a heads up on the best deals in cyberworld:

TECH GADGETS:

MSRP: $56 | Sale Price: $24.95 (54% off), pocketnow.com

Take your photography game to the next level with this powerful and portable telephoto kit. You’ll be able to snap shots with 12x magnification, and an adjustable tripod stand will give you the stability you need to capture the perfect photo in any environment.

View Larger Image 1

$1398, Sony 75-in. 4K HDR Android Smart TV XBR75X800H, costco.ca

LIMITED TIME OFFER

Price valid until 12/03/20Features:

  • 75-in. Smart TV
  • 4K Ultra HD, HDR10, Dolby Vision
  • Compatible with Alexa, Google Assistant
  • Motionflow XR 240
  • 4 × HDMI

WINTER WEAR

CAD$115.99, Black Hooded Puffer Parka – Women, London Fog, zulily.ca

Sale $109.99, Moccasins SOFTMOC.com

TOYS

Kids Ride on Motorcycle

$133.99, Kids Ride-on Motorcycle, Tobbi, wayfair.ca

$459, Oculus Quest 2 Virtual Reality Headset, oculus.com

Hop on to that computer and start browsing! So many deals, so little time! This year will definitely be an easier list to cover now that our travelling has been cut short;) Be sure to take advantage of shipping to your loved one’s front door if visiting is not an option. We are working around a pandemic to spread holiday cheer! We have to learn how to be creative, am I right? Happy Sunday everyone!

Thursday: What’s Baking?

The Crown Season Four: First Look at Diana and Gillian Anderson's Margaret  Thatcher | Vanity Fair

It’s back! I’m so excited to announce that Netflix has finally premiered season 4 of The Crown for our viewing pleasure, and it begins with a clash of titles! The queen and prime minister Margaret Thatcher, are formally introduced, but things take a turn for the worst when the prime minister realizes the vast differences between herself and the royals. When she visits the queen and her family in Scotland, she and her husband suffer great humiliations throughout their stay; from receiving separate rooms for her and her husband to sleep in, to wearing heels to stalk game in the forest .

Imagine that the royal family floods into a room for a sip of tea and a bite to eat after a recreational day outdoors, and the prime minister and her husband join them wearing formal evening attire! It was a “laugh until you cry” moment that had you wondering who was more sensible. If you’re not watching it, you need to make it your new fav and invest a few Saturday nights to binge. It’s just that good!

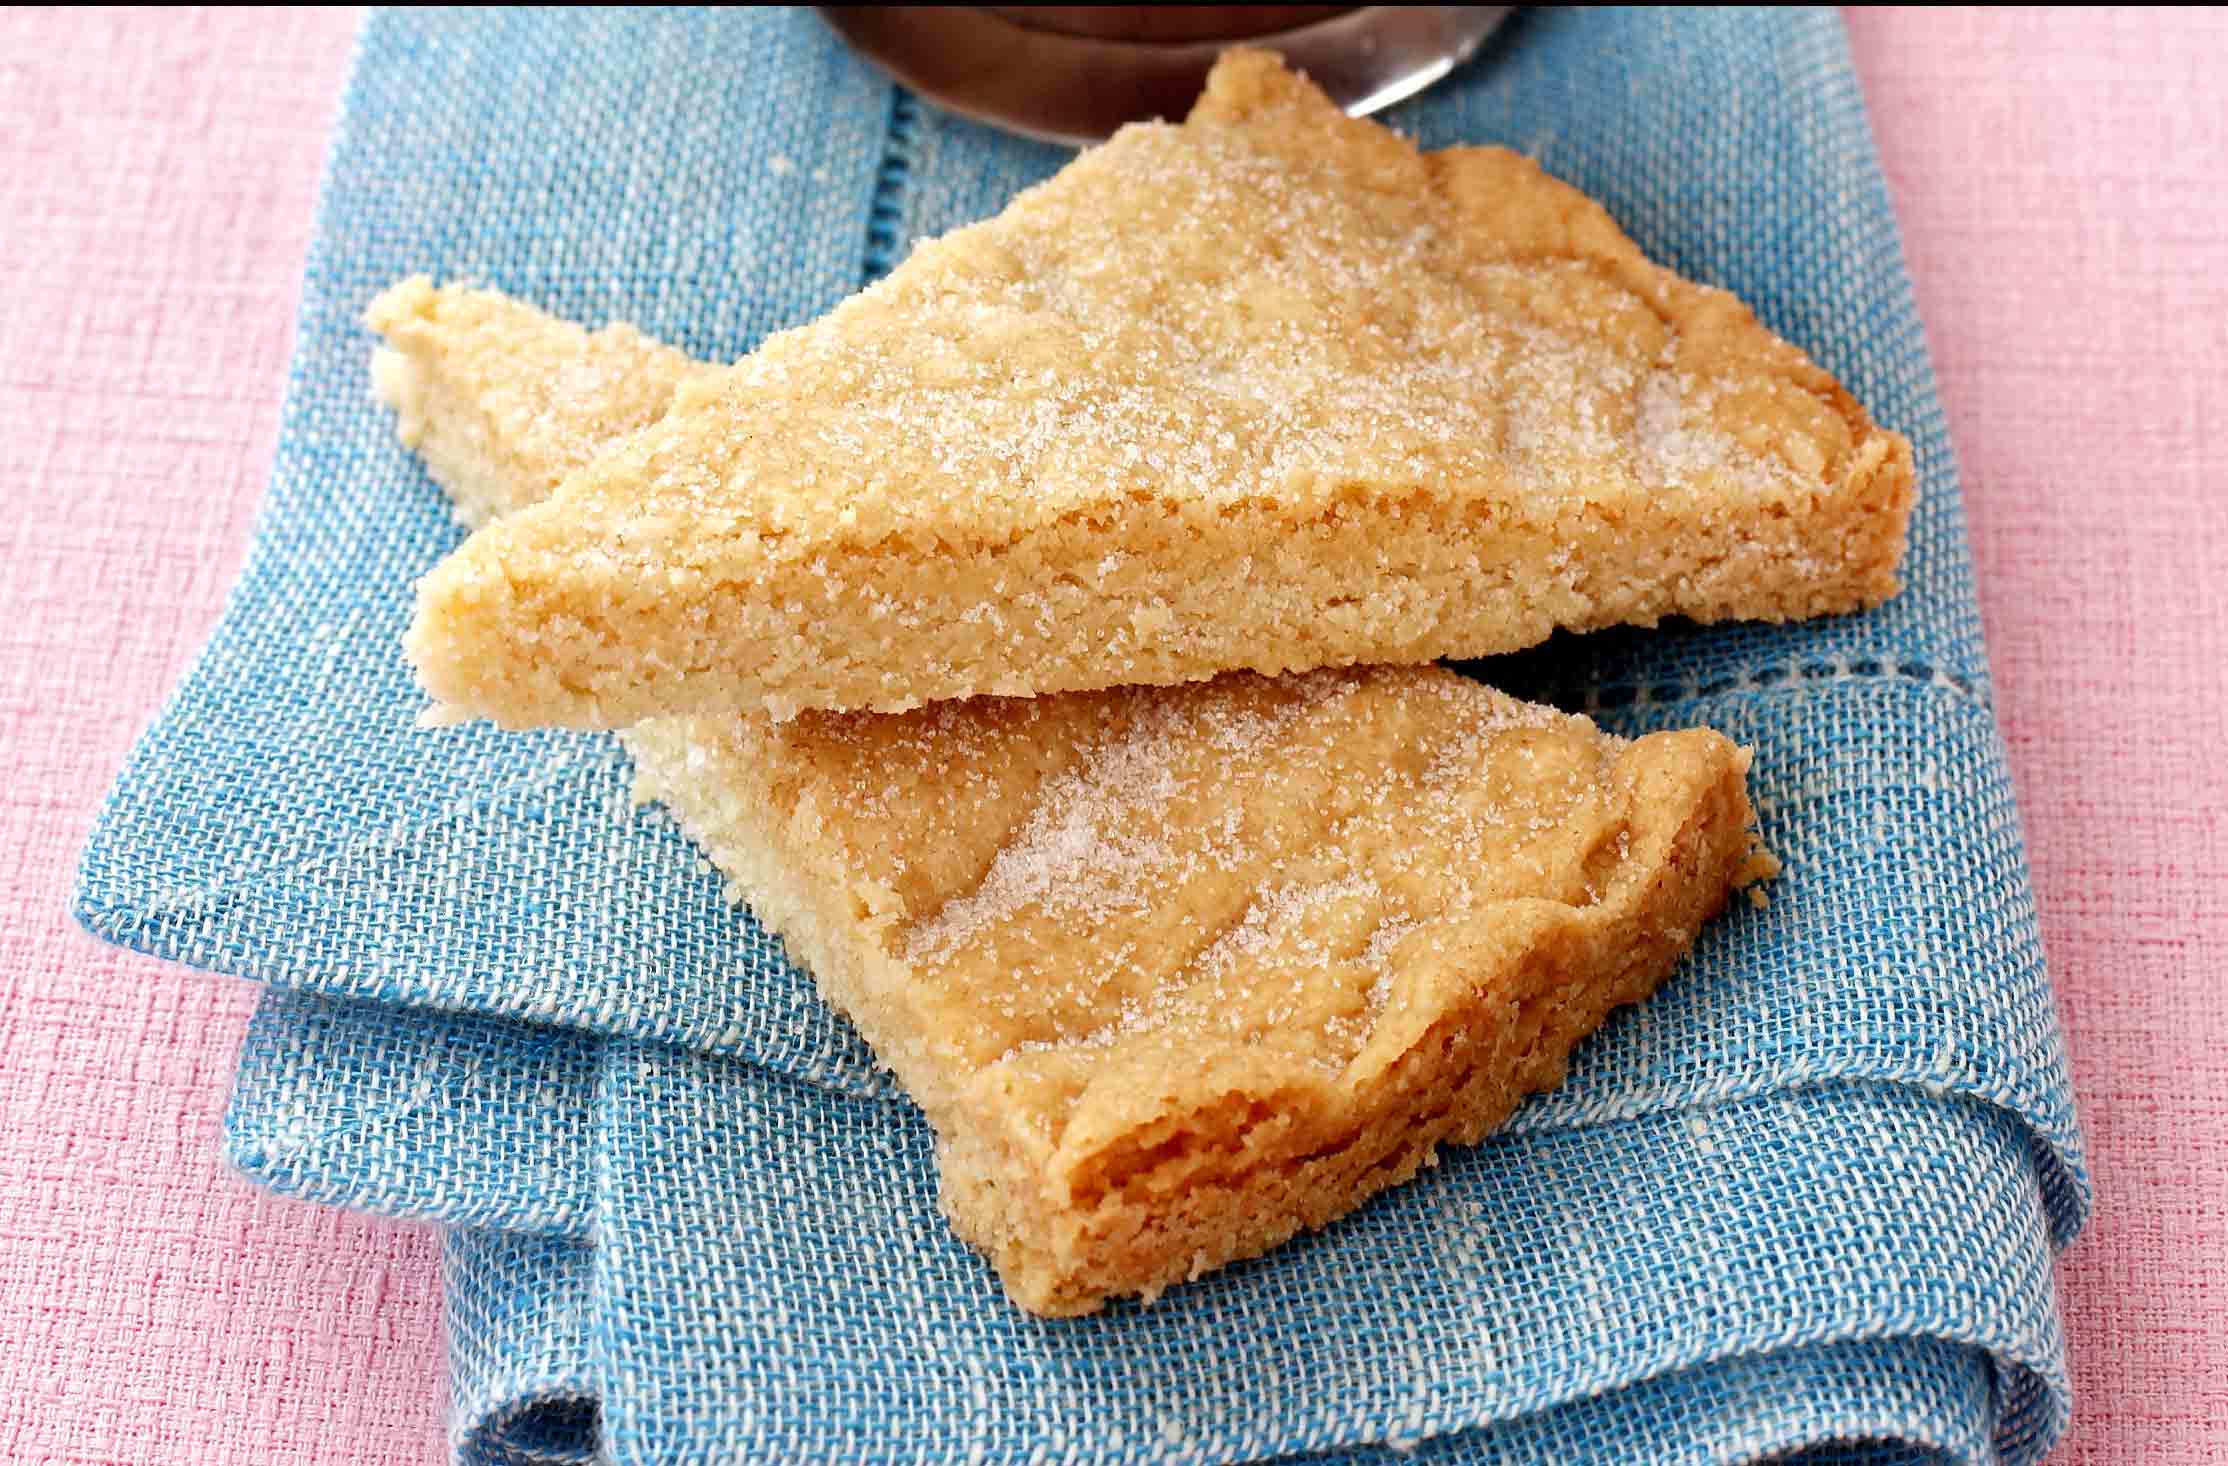
Tea time is of course, my favourite scene so far, and I just had to base my baking off of that moment. So, in honour of this embarrassing moment, we must make scottish shortbread!

scottish shortbread

Scottish shortbread recipe

Ingredients

  • 350g plain flour
  • 125g caster sugar
  • Pinch of salt
  • 250g butter
  • Caster sugar, for dusting
  • 2 x 23cm round sandwich tins, buttered and base-lined

Method

  • Set the oven to 160°C/325°F/Gas Mark 3. Put the flour, sugar and salt into a bowl. Cut the butter into pieces and add to the bowl. Work the mixture until it forms a ball (do not beat the mixture). The mixing may take a while.
  • Divide the mixture into 2 and put a portion into each tin, pressing it into an even layer.
  • Use the handle end of a fork to flute around the edges of the tins, then use the prongs to prick over the surface.
  • Place the tins in the centre of the oven and bake for about 30-40 mins, or until the mixture is a pale golden colour.
  • Remove the shortbread from the tins and cut into petticoat tails, then transfer them to a wire rack to cool. Dust with caster sugar before serving. (Not suitable for freezing).

*Recipe taken from http://www.goodtoknow.co.uk

I do hope you all enjoy your night with the royal family, and do not forget the tea! After all, it is all part of the english experience;) Happy Thursday everyone!

Tuesday: What’s for Dinner?

36 Dawn Simulator: The Sunrise Alarm Clock For Peacefull Wake Up | SoWiseup  | Sunrise alarm clock, Light therapy, Light alarm clock

So, it’s official! It snowed this morning, and the very sight of it instantly gave everyone the winter blues:( You have to admit that moving from summer weather the week before, to a white Christmas in the middle of November, isn’t the most exciting news. As a matter of fact, I was thinking that it might be time to invest in one of those alarm clocks that mimic the sun rising as it goes off. Seriously! The time change thing is really messing with me as I get older, and I realize how dependent I am on the sun’s rays for my energy and vitality. Does this sound like any of you?

Jamaican Curry Chicken on a white plate served with rice and red beans

I will make my way to the heart of this segment, which is Caribbean-inspired flavours for the cold, almost winter days. There is nothing better than a gorgeous bowl of chicken curry with a side of rice and peas or better yet, a soft and delicious roti to tantalize your taste buds! I’ve got the perfect recipe for you to try – and yes, you are welcome;)

JAMAICAN CHICKEN CURRY

INGREDIENTS

INSTRUCTIONS

  • Heat the Instant Pot on Sauté and once it is hot, add the oil. When the oil is hot, add ginger and garlic, and stir for 20 seconds.
  • Add chopped onion and mix well (about 1-2 minutes).
  • Add the Jamaican curry powder, the sliced scotch bonnet pepper, thyme, salt and allspice and mix well.
  • At this point, if you have any browning or sticking that has occurred, use 1/4-1/3 cup of water to deglaze, scraping well, and allowing the water to evaporate.
  • Add chicken, potato, and 1 cup of water and set your Instant Pot to cook on high pressure for 6 minutes. If you are NOT using potatoes, reduce water to 1/2 cup.
  • Allow the pot to sit undisturbed for 10 minutes and then release all remaining pressure. Stir and serve.

Tips And Tricks For Making This Jamaican Curried Chicken

  • You can make this low carb by leaving the potatoes out of the recipe. Omitting the potatoes reduces carbs by 6 gms per serving.
  • You can serve this with rice to help cut down on the spice.
  • All the heat in this recipe comes from the Scotch bonnet pepper, so reduce this if you need it less spicy.

*Recipe taken from twosleevers.com

If you’re not into chicken, go ahead and do chickpeas instead. I promise you it is just as mouth-watering and delightful. Scotch Bonnet peppers are extremely spicy, so if you are not into too much heat, beware! A little piece of pepper goes a long way, so for those who like the challenge I recommend a quarter piece at a time. Instant pots are handy in the kitchen, but if you don’t have one don’t worry, ‘everyting’ is irie mon! You can also use a skillet to achieve the same dish. I hope you enjoy my warm vibes on a frosty day. Happy Tuesday everyone!

Sunday: At Home

80 DIY Christmas Gift Ideas | Best Homemade Christmas Gifts | HGTV

As we burrow into the heart of November, thoughts of Christmas may play on our minds, which is a hint that the season is well on its way. This year is truly a year for sentiment – a chance for people to show their appreciation for one another in very simple, but thoughtful forms. Instead of heading out to purchase mom a big screen tv, consider putting together an album of the year’s best pics to laugh over some hot cocoa. This year has definitely been the year of deep reflection and significant change. Meaningful gifts for the holidays help us to focus on what is important, and will also keep our minds focused on the people we love as we head into the year 2021.

Here are a few ideas you could try during your Sunday afternoons at home:

  1. Scrapbooking
Christmas Page! I love the idea of this. Presents being opened around the  tree. Th… | Christmas scrapbook layouts, Christmas scrapbook, Christmas  scrapbook pages

Scrapbook past memories to create a book your family or friends will enjoy every Christmas. Give a gift that keeps on giving.

2. Old Christmas Card Comebacks

Christmas Gift Ideas For The Car Lover In Your Life - Rachel in Real Life

Dig up your old Christmas cards that someone has given you, and repurpose it into a brand new one for Christmas. Be creative and cut and paste, date and photocopy past messages to create a card your loved one will never forget!

3. Mason Jar Christmas Candles

29 Festive Mason Jar Christmas Crafts | Homelovr

Put together a beautiful décor piece that the receiver can use in their home for years to come.

4. Classic Christmas Home Videos

Capturing past hysterical Christmas moments to make an official video the whole family can come together to watch, and laugh until they cry.

There is so much work to be done before the big day! Start your brainstorming to come up with the perfect gift that will never be forgotten. Spread some cheer this holiday season! It will certainly be a welcomed change. Happy Sunday everyone!

Tuesday: What’s for Dinner?

It wasn’t anything fancy, just a juicy salmon and a hearty mushroom risotto to compliment! Fabulous! Those who know me, know that this is a typical weeknight dinner, and why not? Can’t we eat with sophistication, but within a tight time frame? Of course we can! Rachel Ray (TV Chef and show host) says that if you cut and prep ahead of time, it could actually cut your cooking time in half. So, I put the theory to the test and saved a whole half hour! Also, if you have a magic bullet, or something like it, try blending your onions, garlic, and other herbs along with some olive oil. The chopping is eliminated and the pesky chunks of garlic you missed are now a wet rub.

When you make recipes often enough, you tend to memorize them which makes it fairly simple to get through in a hurry. On the nights that you may not have a lot of time to spare, go with what’s familiar to avoid mistakes. Your hungry family, or your own belly will thank you! When you get those delicious, high end meals out of the kitchen in an hour or less, you’ll have to thank me for making you look so good;) Here’s to less time cooking, and more time eating! Happy Tuesday everyone!

LISA’S BAKED SALMON

Ingredients:

Fresh salmon

1/2 medium white onion

1 clove of garlic

Salt and Pepper (sprinkle)

2 fresh leaves of basil

2 tablespoons of olive oil

1 tablespoon mustard powder

Red pepper flakes (sprinkle)

Instructions:

  1. Soak the salmon in cold vinegar and lemon water for 10-15 mins.
  2. Rinse and drain.
  3. Sprinkle salt, pepper, mustard, and red pepper flakes. In the blender, blend the remaining ingredients and pour on top of salmon.
  4. Rub in all of the ingredients thoroughly and bake on 350 degrees for 20 mins.
  5. Enjoy!

Monday: Confessions of a Shopping Diva!

Fall Outfit Ideas for Work - Best Fall Wardrobe Pieces for Women

A change of season demands a change of wardrobe, and I am ready to shop ’til I drop for the best of what Fall-turn-Winter has to offer! The look we are trying to achieve: Go get em’ professional, who happens to have an after hours cocktail date. A full length jacket, with sassy boots and a few accessories to impress, are just a few items in our “Like a Boss” vibe!

Genuine Soft Lambskin Leather Women Knee Length Trench Coat  innovatis-suisse.ch

Genuine Soft Lambskin Leather Women Knee Length Trench Coat, $98.46, AKIFLUJ

Mens 100% Sheepskin Leather Jackets Long Business Casual Trench Coats Plus  G49 | eBay

Mens 100% Sheepskin Leather Jackets Long Business Casual Trench Coats Plus G49, $152 Ebay

Winnie Grand Bootie, $262.50, COLE HAAN

15 Best Men's Winter Boots 2020 - Most Stylish Men's Winter Shoes

Moc Toe Boot, $309, RED WING HERITAGE

8 Cool-Girl Hats To Up Your Fall Wardrobe Game - Camille Styles

Walker Felt Hat, $128, FREE PEOPLE.COM

Grey newsboy cap Mens newsboy hat Tommy Shelby hat Peaky | Etsy

Harris Tweed Overcheck Herringbone Wool Newsboy Cap, $56.95, VINTAGE HAT SHOP

Cashmere Plaid Scarf – Ethereal Boutique

Cashmere Plaid Scarf, $45, ETHEREAL BOUTIQUE

14 Best Scarf Brands For Men That Will Help You Defeat Winter In Style

Wool/Cashmere Ribbed Scarf in Flannel Grey, $248, CORGI

Such a bossy look with nowhere to go? Start making plans! You can’t possibly go to this extreme when no one is watching;) If you love a particular item, buy it and make it your staple. You don’t need everything to be high end, but there’s alway the concept of mix and matching! Be wise, shop smart, save a bundle! All the best to you, and happy Monday everyone!

Sunday: At Home

Another weekend gone by and I don’t know about you, but I am completely exhausted! It was an action-packed Saturday when we headed out to Collingwood to see the Scenic Caves. I have to say that we had an incredible time! There were so many interesting trails, and some that lead to a huge suspension bridge that had an awesome view of the Georgian Bay. According to my fitness app, we made 17, 894 steps, and I felt every one of them;) You couldn’t even ask for better weather, too! The temperature was up to 18 degrees celsius, or 64 degrees fahrenheit for our US friends! It almost felt like a summer repeat, which got me feeling good all over:)

The caves were the best part about the trip, with so many entrances to explore. The most exciting cave of all was the “Fat Man’s Misery” cave, where tight spaces was the central theme. Oh man, did I sweat through a few of those passages, and I had to reach back and help fellow cave explorers behind me, but overall it was definitely an exhilarating adventure! The only negative thing was the pricing to get in. It cost my family of five $140 to enter the park to do trails, caves, and play in the playground. A bit pricey to be one with nature, if you ask me.

Needless to say that Sunday is a complete bust! I can’t move an inch, but the basics were done: Raking leaves, laundry, dinner, bathroom clean up, hair washing and styling (for my daughter). All of this before Monday morning, and before you know it you’re back at it again, but with a ton of memories under your belt that makes each day worth the fuss. I wish you all a fabulous week ahead, and happy Sunday everyone!

Thursday: What’s Baking?

It's Complicated Is a Garbage Movie – Supposedly Fun

Does anyone remember this film? Meryl Streep is one of my favourite actors, and in this film she plays a woman on the flip-side of a story about a marital affair with her own ex-husband! She steals her husband back from the other woman, only to realize that she did not want him in her life anymore. A phenomenal film that deals with middle-age drama, and the ups and downs of relationships. If you are a fan of the ‘country chic’ style, you will love her house on set. If you’re a fan of bakeries, you will love the shop she owns and operates in the film! After the scene where she takes her new boyfriend in to the bakery to make chocolate croissants together, I was in love! I’m not sure what I am more crazy about: the bakery or her croissants!

Remembering how delicious the scene was, I thought to myself, “Why not make Chocolate Croissants?” This is a terrific idea if I do say so myself, and I’ve happily added a recipe to equip you for the task!

Extra flaky and buttery homemade chocolate croissants (Pain au Chocolat) are incredible warm from the oven. Recreate this French bakery classic at home with a recipe and video tutorial on sallysbakingaddiction.com

Homemade Chocolate Croissants (Pain au Chocolat)

Ingredients

  • 1/4 cup (4 Tablespoons; 60g) unsalted butter, softened to room temperature
  • 4 cups (500g) all-purpose flour (spoon & leveled), plus more for rolling/shaping
  • 1/4 cup (50g) granulated sugar
  • 2 teaspoons salt
  • 1 Tablespoon active dry or instant yeast
  • 1 and 1/2 cups (360ml) cold whole milk
  • one 4-ounce bar (113g) semi-sweet or bittersweet chocolate, coarsely chopped
  • optional: confectioners’ sugar for dusting

Butter Layer

  • 1 and 1/2 cups (3 sticks; 345g) unsalted butter, softened to room temperature
  • 2 Tablespoons (16g) all-purpose flour

Egg Wash

  • 1 large egg
  • 2 Tablespoons (30ml) whole milk

Instructions

  1. Preliminary notes:Read the whole recipe before beginning.
  2. Make the dough: Cut the butter in four 1-Tablespoon slices and place in the bowl of an electric stand mixer fitted with the dough hook attachment (or you can use a handheld mixer or no mixer, but a stand mixer is ideal). Add the flour, sugar, salt, and yeast. Turn the mixer on low-medium speed to gently combine the ingredients for 1 minute. With the mixer running, slowly pour in the milk. Once all of the milk is added, turn the mixer up to medium speed and beat the dough for at least 5 full minutes. (If you don’t have a mixer, knead by hand for 5 minutes.) The dough will be soft. It will (mostly) pull away from the sides of the bowl and if you poke it with your finger, it will bounce back. If after 5 minutes the dough is too sticky, keep the mixer running until it pulls away from the sides of the bowl.
  3. Remove dough from the bowl and, with floured hands, work it into a ball. Place the dough on a lightly floured silicone baking mat lined, lightly floured parchment paper lined, or lightly floured baking sheet. (I recommend a silicone baking mat because you can roll the dough out in the next step directly on top and it won’t slide all over the counter.) Gently flatten the dough out, as I do in the video above, and cover with plastic wrap or aluminum foil. Place the entire baking sheet in the refrigerator and allow the covered dough to rest in the refrigerator for 30 minutes.
  4. Shape the dough: Remove the dough from the refrigerator. I like to keep the dough on the silicone baking mat when I’m rolling it in this step because the mat is nonstick and it’s a handy guide for the exact measurement. Begin flattening out the dough with your hands. You’re rolling it out into a rectangle in this step, so shaping it with your hands first helps the stretchy dough. Roll it into a 14×10-inch rectangle. The dough isn’t extremely cold after only 30 minutes in the refrigerator, so it will feel more like soft play-doh. Be precise with the measurement. The dough will want to be oval shaped, but keep working the edges with your hands and rolling pin until you have the correct size rectangle.
  5. Long rest: Place the rolled out dough back onto the baking sheet (this is why I prefer a silicone baking mat or parchment because you can easily transfer the dough). Cover the rolled out dough with plastic wrap or aluminum foil, place the entire baking sheet in the refrigerator and allow the covered dough to rest in the refrigerator for 4 hours or overnight. (Up to 24 hours is ok.)
  6. Butter layer (begin this 35 minutes before the next step so the butter can chill for 30 minutes): In a large bowl using a hand-held mixer or stand mixer fitted with a paddle or whisk attachment, beat the butter and flour together until smooth and combined. Transfer the mixture to a silicone baking mat lined or parchment paper lined baking sheet. (Silicone baking mat is preferred because you can easily peel the butter off in the next step.) Using a spoon or small spatula, smooth out into a 7×10-inch rectangle. Be as precise as you can with this measurement. Place the entire baking sheet in the refrigerator and chill the butter layer for 30 minutes. (No need to cover it for only 30 minutes.) You want the butter layer firm, but still pliable. If it gets too firm, let it sit out on the counter for a few minutes to gently soften. The more firm the butter layer is the more difficult it will be to laminate the dough in the next step.
  7. Laminate the dough: In this next step, you will be rolling out the dough into a large rectangle. Do this on a lightly floured counter instead of rolling out on your silicone baking mat. The counter is typically a little cooler (great for keeping the dough cold) and the silicone baking mat is smaller than the measurement you need. Remove both the dough and butter layers from the refrigerator. Place the butter layer in the center of the dough and fold each end of the dough over it. If the butter wasn’t an exact 7×10-inch rectangle, use a pizza cutter or sharp knife to even out the edges. Seal the dough edges over the butter layer as best you can with your fingers. On a lightly floured counter, roll the dough into a 10×20-inch rectangle. It’s best to roll back and forth with the shorter end of the dough facing you, like I do in the video above. Use your fingers if you need to. The dough is very cold, so it will take a lot of arm muscle to roll. Again, the dough will want to be oval shaped, but keep working it with your hands and rolling pin until you have the correct size rectangle. Fold the dough lengthwise into thirds as if you were folding a letter. This was the 1st turn.
  8. If the dough is now too warm to work with, place folded dough on the baking sheet, cover with plastic wrap or aluminum foil, and refrigerate for 30 minutes before the 2nd turn. I usually don’t have to.
  9. 2nd turn: Turn the dough so the short end is facing you. Roll the dough out once again into a 10×20-inch rectangle, then fold the dough lengthwise into thirds as if you were folding a letter. The dough must be refrigerated between the 2nd and 3rd turn because it has been worked with a lot by this point. Place the folded dough on the baking sheet, cover with plastic wrap or aluminum foil, and refrigerate for 30 minutes before the 3rd turn.
  10. 3rd turn: Roll the dough out once again into a 10×20-inch rectangle. Fold the dough lengthwise into thirds as if you were folding a letter.
  11. Long rest: Place the folded dough on the lined baking sheet, cover with plastic wrap or aluminum foil, and refrigerate for 4 hours or overnight. (Up to 24 hours is ok.)
  12. At the end of the next step, you’ll need 2 baking sheets lined with silicone baking mats or parchment paper. The dough is currently on a lined baking sheet in the refrigerator, so you already have 1 prepared!
  13. Shape the croissants: Remove the dough from the refrigerator. On a lightly floured counter, roll the dough out into an 8×20-inch rectangle. Use your fingers if you need to. Once again, the dough is very cold, so it will take a lot of arm muscle to roll. The dough will want to be oval shaped, but keep working it with your hands and rolling pin until you have the correct size rectangle. Using a pizza cutter or sharp knife, slice the dough in half vertically. Each skinny rectangle will be 4 inches wide. Then cut 3 even slices horizontally, yielding 8 4×5-inch rectangles. See photo and video above for a visual. Cut each rectangle in half lengthwise so you have 16 2×5-inch rectangles. Work with one rectangle at a time. Using your fingers or a rolling pin, stretch it to be about 8 inches long. Do this gently as you do not want to flatten the layers. Place a few small pieces of chocolate in a single layer at one end and tightly roll the dough up around the chocolate. Make sure the end is on the bottom. Repeat with remaining dough, placing the shaped croissants on 2 lined baking sheets, 8 per sheet. Loosely cover with plastic wrap or aluminum foil and allow to rest at room temperature (no warmer! I suggest just keeping on the counter) for 1 hour, then place in the refrigerator to rest for 1 hour or up to 12 hours. (Or freeze, see freezing instructions. I prefer the shaped croissants to be cold going into the oven. When you poke the dough with your finger, it will slowly bounce back. That means they are ready to be baked.
  14. Preheat oven to 400°F (204°C).
  15. Egg wash: Whisk the egg wash ingredients together. Remove the croissants from the refrigerator. Brush each lightly with egg wash.
  16. Bake the croissants: Bake until croissants are golden brown, about 20 minutes. Rotate the pans halfway through baking. If croissants show signs of darkening too quickly, reduce the oven to 375°F (190°C).
  17. Remove chocolate croissants from the oven and place on a wire rack to cool for a few minutes before serving. They will slightly deflate as they cool. If desired, dust with confectioners’ sugar before serving.
  18. Croissants taste best the same day they’re baked. Cover any leftover croissants and store at room temperature for a few days or in the refrigerator for up to 1 week. You can also freeze for up to 3 months, then thaw on the counter or overnight in the refrigerator. Warm up to your liking.

*Recipe taken from sallysbakingaddiction.com

It is a lengthy recipe but if you read over it thoroughly before you start, I promise that it won’t be that confusing. I hope you have a fabulous time baking, and make sure you watch the movie! I know you’ll enjoy it;) Happy Thursday everyone!

Wednesday: Do it Yourself Challenge!

Top 60 Best Coffee Bar Ideas - Cool Personal Java Cafe Designs

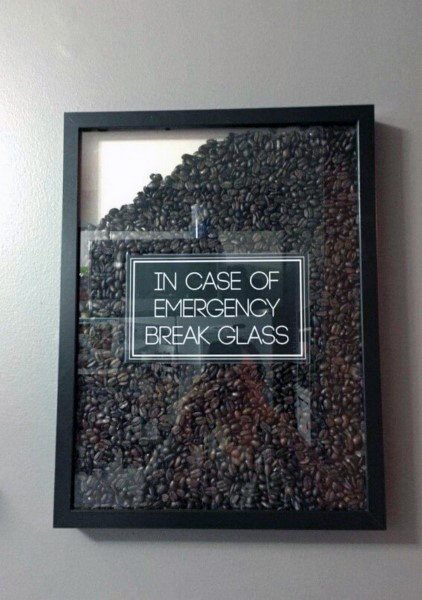
If you are a lover of coffee like I am, then you must be hysterical over the piece of art in the picture above. Coffee is no joke! For some, the pot must always be brewing, and for others, a simple cup a day will suffice. For me, I not only love to drink it, but I also love the idea of giving it a special home at home! Today’s DIY challenge is to make a coffee bar that resembles your local coffee shop; including everything from the blackboard signs, to the stacked teacups. Putting a coffee bar together makes your coffee experience a glamourous one, whether you sip alone or with a friend.

This is a simple transformation that only requires some old wood for the chalkboard frame, a vintage dresser or side table, and a lot of imagination! First thing’s first, you must decide on the perfect place to set up the coffee bar of your dreams! This could be the kitchen, or even your dining room. The main idea is to give it a home where it’s easily accessible to you and your guests, as well as a spot that would compliment the look.

Adding shelving to the scene will allow room for décor pieces that will add to the bar concept, and would also house some of the essentials needed for coffee/tea time. For the countertop display, a coffee grinder and/or coffee maker should be the main focus, followed by a kettle and teacups. Cake domes or platters are a welcomed addition to the bar because it suggests that treats are to be served! Some people like to include coffee syrups to be fancy, but my idea of good coffee is best uncomplicated:)

Are coffee bars only for coffee? Absolutely not! This area can double as a bar for cocktails, or even service for a dinner party. You can include fresh flowers and candles to make it elegant, or fill a few vases with corks for a wine and cheese party. There are so many uses for a space like this, you will wonder why you had not thought of adding one before!

Does your coffee bar have to be out in the open? Not necessarily. Your kitchen pantry could double as a coffee bar if you really wanted to keep it hidden until needed. How incredible it would be to throw open the doors when your guests are ready to be served, only to reveal a swanky, built-in coffee bar! You just can’t beat that kind of class;) Take a good look around your home and make an epic plan for a coffee bar that will keep your guests coming back for a refill. Enjoy your evening, and happy Wednesday everyone!

Tuesday: What’s for Dinner?

Review: Money Heist - Feeds NITT

So, I started a series on Netflix called, “Money Heist,” which is real edge-of-your-seat action! It’s about a group of outlaws that come together to rob the Royal Mint of Spain. With the Professor’s master plan, the outlaws calculate every anticipated move of the police and come up with genius tactics to print and steal 1 billion euros! I’m telling you, you won’t be able to stop for a bathroom break! It’s too hot! Now, the scene is set in Spain, and the culture is alive in the series with the scenery, music and of course, the food!

One particular dish we will be trying for dinner, has a background story that is too funny for words! During the heist, the outlaws negotiated a good meal for themselves and the hostages to eat after a full day of war. They request Paella and beer to be delivered to them, and the famous scene shows the police hauling in eight gigantic pans of the hot rice in all of its glory, along with ice-cold beer! It was a sight to behold, and a very mouth-watering scene! At that moment, I thought to myself, “What about Paella for dinner?”

I found a delicious recipe taken from Food and Wine that received fantastic reviews! Take a look:

Seafood-and-Chicken Paella with Chorizo

Seafood-and-Chicken Paella with Chorizo

Ingredients

Ingredient Checklist

  • 4 ounces fresh chorizo (casings removed)
  • 1 small onion (thinly sliced)
  • 1 garlic clove (thinly sliced)
  • ½ cup canned diced tomatoes
  • 1 cup arborio rice
  • 1 pinch of saffron dissolved in 2 tablespoons of water
  • 1 ½ cups water
  • Salt and freshly ground pepper
  • ¼ cup plus 1 tablespoon extra-virgin olive oil
  • 1 pound large shrimp (shelled and deveined)
  • ¼ cup dry white wine
  • 1 tablespoon fresh lemon juice
  • ½ pound mussels (scrubbed and debearded)
  • ½ pound cockles (scrubbed and rinsed)
  • 1 ½ cups cooked chicken (8 ounces preferably dark meat)
  • 2 tablespoons chopped flat-leaf parsley
  • 1 scallion (thinly sliced)

Directions

Instructions Checklist

  • Step 1 Preheat the oven to 350°. In a 10-inch paella pan or ovenproof skillet, cook the chorizo over moderate heat, breaking it up with a spoon, until some of the fat is rendered and the chorizo is browned, 4 minutes. Add the onion and garlic and cook over low heat, stirring, until softened and just beginning to brown, 8 minutes. Stir in the tomatoes, rice, saffron with its liquid and the 1 1/2 cups of water. Season with salt and pepper and bring to a boil. Cover and simmer over low heat, without stirring, until the rice is al dente and the liquid is absorbed, 15 minutes.
  • Step 2 In a large skillet, heat the 1/4 cup of olive oil until shimmering. Season the shrimp with salt and pepper, add them to the skillet and cook over high heat, turning once, until pink and cooked through, about 3 minutes. Using a slotted spoon, transfer the shrimp to the rice. Discard the oil.
  • Step 3 Wipe out the skillet. Pour in the wine and lemon juice. Add the mussels and cockles, cover and cook, shaking the skillet, until the mussels open, about 3 minutes. Pour the mussels and cockles and their cooking liquid over the rice.
  • Step 4 Stir the cooked chicken into the rice. Cover and cook in the oven for about 5 minutes, until the paella is just heated through. Garnish with the parsley and scallion, drizzle with the remaining 1 tablespoon of olive oil and serve.

*Recipe taken from foodandwine.com

Money Heist' Season 4: Theory claims Nairobi is alive and fans can't wait  for return of 'bad***' character | MEAWW

Although this dish is for seafood lovers, I am sure you can substitute anything you want. After all, Paella is a mishmash of all the flavours and ingredients you adore! The cold beer, well, there isn’t a thing that can substitute that;) If you decide to watch the series, drop me a line about what you think. My favourite character in the outlaw group is Nairobi. She has an entertaining personality, loaded with spunk! You have to watch in order to know what I mean. Eat, drink, watch and be merry my friends! Until next time, happy Tuesday everyone!